Electron is a powerful open-source framework that allows developers to create cross-platform desktop applications using web technologies (HTML, CSS, JS).
Electron is free and it is maintained by GIT. Desktop watsup, Figma, Microsoft teams, VS code editor and many other desktop applications are build with electronjs only. So in this blog, you are going to learn how to create a desktop application.
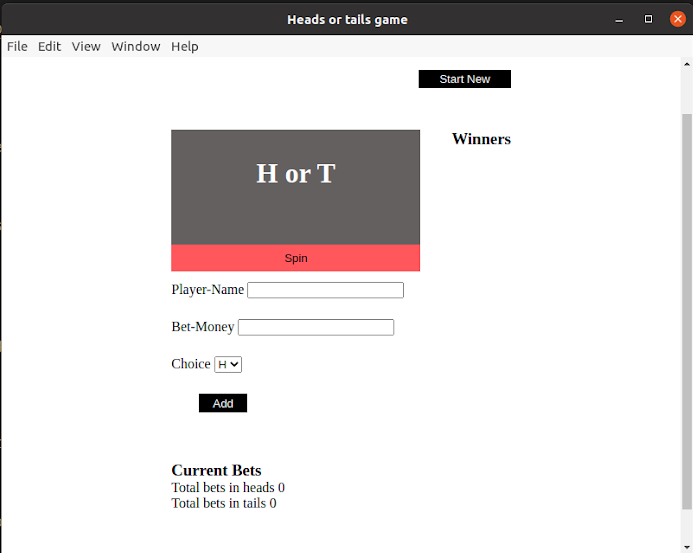
As we know that electronjs desktop applications are interactive with the web technologies, I have designed a small game using HTMl, CSS, and Javascript that is a flip-a-coin game. So let’s get started with the application building.
Step:1 Creating project
To go for application building, first, we have to create a project. My project is a flip-the-coin game and the related code for the project is given below.
index.html
<!DOCTYPE html>
<html lang="en">
  <head>
    <link rel="stylesheet" href="./style.css" />
    <title>flip the coin game</title>
  </head>

  <body>
    <header>
      <div class="start-btn">
        <button id="startNew" class="start">Start New</button>
      </div>
    </header>
    <div class="gameBoard">
      <div class="coinBlock">
        <h1 id="coin-spin">H or T</h1>
        <button id="spin" class="spin">Spin</button>
      </div>

      <div class="winner" id="winner">
        <h3>Winners</h3>
        <div>
          <div>
            <p class="contest-1"></p>
            <p id="contest">Contest not started yet</p>

            <div class="dis">
              <p class="headsWinners"></p>
              <p class="tailsWinners"></p>
              <p class="companyGain"></p>
            </div>
          </div>
        </div>
      </div>
    </div>
    <p class="progress"></p>
    <div class="local-storage">
      <form id="playerList">
        <div>
          <label> Player-Name</label>
          <input type="text" id="player-name" required />
        </div>
        <div>
          <label>Bet-Money </label>
          <input type="number" id="bet-money" required />
        </div>
        <div>
          <label>Choice</label>
          <select id="select" class="coin">
            <option id="head" value="H">H</option>
            <option id="tail" value="T">T</option>
          </select>
        </div>
        <div>
          <button id="add">Add</button>
        </div>
      </form>
    </div>
    <div class="playersData">
      <h3>Current Bets</h3>
      <div class="list-add">
        <p id="list" class="list">No bets added yet</p>
      </div>
      <div class="columns">
        <ul id="list-items"></ul>
      </div>
      <div class="total-bet">
        <p class="heads-total"></p>
        <p class="tails-total"></p>
      </div>
    </div>

    <script src="./script.js"></script>
  </body>
</html>
style.css
* {
  margin: 0;
  padding: 0;
  box-sizing: border-box;
}
body {
  display: block;
  width: 50%;
  margin: 0 auto;
  padding: 5rem 0;
}
header {
  display: flex;
  flex-flow: row-reverse;
}
.start {
  padding: 0.2rem 1.5rem;
  background: #000;
  color: #fff;
  border: none;
}
.gameBoard {
  display: flex;
  justify-content: space-between;
  padding: 3rem 0 1rem 0;
}
.time {
  padding: 0.5rem 0;
  color: #000;
}
#playerList div {
  padding: 0 0 1.5rem 0;
}
.coinBlock {
  height: 10rem;
  background: #646060;
  color: #fff;
  max-width: 100%;
  width: 18rem;
  text-align: center;
}
.coinBlock div {
  display: flex;
  flex-flow: column;
  padding: 4rem 0 0 0;
  width: 100%;
}
.coinBlock h1 {
  padding: 2rem 1rem 0;
}
.spin {
  background-color: #ff5959;
  border: 0;
  width: 100%;
  padding: 0.5rem;
  margin: 4rem 0 0 0;
}
#listOfPlayers {
  margin: 2rem 0 0 0;
}

#add {
  padding: 0.2rem 1rem;
  margin: 0 2rem;
  background-color: #000;
  color: #fff;
  border: none;
}
.playersData {
  margin: 2rem 0 1rem 0;
}
#contest {
  padding: 1rem 0;
}
script.js
"use strict";
const startNew = document.getElementById("startNew"),
  coinSpin = document.getElementById("coin-spin"),
  spinBtn = document.getElementById("spin"),
  playerName = document.getElementById("player-name"),
  betMoney = document.getElementById("bet-money"),
  selectOption = document.getElementById("select"),
  btnAdd = document.getElementById("add"),
  listAdd = document.querySelector(".list-add");

var coinArray = ["H", "T"],
  items = JSON.parse(localStorage.getItem("head-or-tails")) || [],
  headOrTails = JSON.parse(localStorage.getItem("selectOption")) || [],
  betsOnHeads = 0,
  betsOnTails = 0,
  betMoneyV = Number(betMoney.value);

spinBtn.addEventListener("click", () => {
  winnerList();
  spinCoin();
  document.querySelector(".progress").innerHTML =
    "Spinning in progress... Wait for 3 seconds";
  document.querySelector(".contest-1").innerHTML = "Game is in Progess....";
});

btnAdd.addEventListener("click", () => {
  addBet();
});

function spinCoin() {
  setTimeout(() => {
    let spinRes = coinArray[Math.floor(Math.random() * coinArray.length)];
    localStorage.setItem("spinRes", spinRes);
    document.getElementById("coin-spin").innerHTML = spinRes;
    winnerList();
    distibute();
    document.querySelector(".progress").innerHTML = "";
    document.querySelector(".contest-1").innerHTML = "";
  }, 3000);
}

// Local Storage function
function addBet() {
  let items = getBets(),
    inputBox = document.getElementById("player-name"),
    item = inputBox.value,
    item1 = betMoney.value,
    item2 = selectOption.value;

  if (item === "" && item1 === "" && item2 === "") {
    return (document.getElementById("list").innerHTML =
      "you need to add name , bet and choice");
  }
  items.push({
    playerName: item,
    betMoney: item1,
    selectOption: item2,
  });
  localStorage.setItem("bets", JSON.stringify(items));
  listItems();

  inputBox.value = "";
  betMoney.value = "";
  selectOption.value = "";
}

function getBets() {
  return JSON.parse(localStorage.getItem("bets")) || [];
}

function getSpinResult() {
  return localStorage.getItem("spinRes") || "";
}

function listItems() {
  let items = getBets();
  let resBetUl = "<ul>";
  items.forEach((item) => {
    resBetUl +=
      "<li>" +
      item.playerName +
      "," +
      item.betMoney +
      ":" +
      item.selectOption +
      "</li>";
  });
  resBetUl += "</ul>";
  document.getElementById("list").innerHTML = resBetUl;
  selectChoice();
  document.querySelector(
    ".heads-total"
  ).innerHTML = `Total bets in heads ${betsOnHeads}`;
  document.querySelector(
    ".tails-total"
  ).innerHTML = `Total bets in tails ${betsOnTails}`;
}

function winnerList() {
  let bets = getBets();
  let spinRes = getSpinResult();
  const result = bets.filter((bet) => bet.selectOption === spinRes);

  var sum = 0;
  var resDiv = "<div class='li-style'><ul>";
  result.forEach(ResVal);

  function ResVal(item, index) {
    sum = sum + Number(item.betMoney);
    resDiv +=
      "<li>" +
      item.playerName +
      " : " +
      Number(item.betMoney) * 2 +
      " Won ( " +
      Number(item.betMoney) +
      " )" +
      "</li>";
  }
  resDiv += "</ul></div>";
  document.getElementById("contest").innerHTML = resDiv;
}

// Dropdown select head or tails function
function selectChoice() {
  if (document.getElementById("head").selected) {
    betsOnHeads += Number(betMoney.value);
  } else if (document.getElementById("tail").selected) {
    betsOnTails += Number(betMoney.value);
  }
}
let headsTotal = 0;
let tailsTotal = 0;
let totalPaidToWinners = 0;

function distibute() {
  document.querySelector(
    ".headsWinners"
  ).innerHTML = `Total Paid to Winners ${(headsTotal = betsOnHeads * 2)}`;
  document.querySelector(
    ".tailsWinners"
  ).innerHTML = `Total amount recived ${(tailsTotal +=
    betsOnTails + betsOnHeads)}`;

  document.querySelector(".companyGain").innerHTML = ` ${(totalPaidToWinners =
    headsTotal - tailsTotal)} is Company gain/loss`;
}

startNew.addEventListener("click", () => {
  // refreshThePage()
  localStorage.clear("bets");
  document.querySelector(".heads-total").innerHTML = "";
  document.querySelector(".tails-total").innerHTML = "";
  document.querySelector(".heads-total-1").innerHTML = "";
  document.querySelector(".tails-total-2").innerHTML = "";
  document.querySelector(".tails-total-3").innerHTML = "";
  document.getElementById("list").innerHTML = "No bets addes yet";
  document.getElementById("contest").innerHTML = "Contest not started yet";
  document.getElementById("coin-spin").innerHTML = "Heads or Tails";
});

function refreshThePage() {
  location.reload();
}

(function () {
  listItems();
  winnerList();
})();
Now we have a project flip the coin game. So to build this project as a desktop application with electronjs follow the below steps without missing.
Step:2 Initialize the project
We can initialize the project by creating a package.json file. You can create a package.json file with the below command.
First, you need to change your current working directory to your project folder with the following command
$ cd project/folder/pathThen you can execute the below command to initialize your project.
$ npm initIt will ask for some values like the name of the project, description, and some authoring information. Provide the info as per the requirement. The result of the json file is
package. json
{
  "/*comment": "name value goes your own project name :)",
  "name": "flip-the-coin-game",
  "/*comment": "suggests the latest version :)",
  "version": "1.0.0",
  "/*comment": "your project descriptiom :)",
  "description": "game",
  "/*comment": "applivation buid js file name :)",
  "main": "main.js",
  "scripts": {
        "test": "echo \"Error: no test specified\" && exit 1"
  },
  "/*comment": "author name and licence :)",
  "author": "navya",
  "license": "ISC"
}
Step:3 Install electron packages
After installing the project we need to install the required packages and dependencies of the electron. For that, you can run the following command in your project folder path.
$ npm install --save-dev electronStep:4 writing your application in main.js
Right immediate saving dev electron packages we need to write the main.js file to run our project as an application. Electrons work in two principles one is with the main process in other words server-side response and the other is renderer side and that is the client-side response.
To justify the above statement, here the server-side response code will be in main.js with the required dependencies and the client-side response is our .html document. Add the code given below in your main.js file.
main.js
// step:1 here app and BrowserWindow are the assignment of electron module which required to activate the module and to create the browser window
const { app, BrowserWindow } = require("electron");
// the below function is to create the new window and also we are setting the width and height of the application here
function createWindow() {
  const mainWindow = new BrowserWindow({
    width: 800,
    height: 600,
  });
//loadint the client side response file and that is our .html file
  mainWindow.loadFile("index.html");
}
//code for checking weather the app is ready or not and processing the app
app.whenReady().then(createWindow);

app.on("window-all-closed", () => {
  if (process.platform !== "darwin") {
    app.quit();
  }
});

app.on("activate", () => {
  if (BrowserWindow.getAllWindows().length === 0) {
    createWindow();
  }
});
When you are done with writing your application in main.js then go for the next step.
If you encounter any troubleshooting problems then better start from scratch without missing a single line of code.
Step:5 Running the unbuild app
To run the unbuild app, run the following command in your project folder
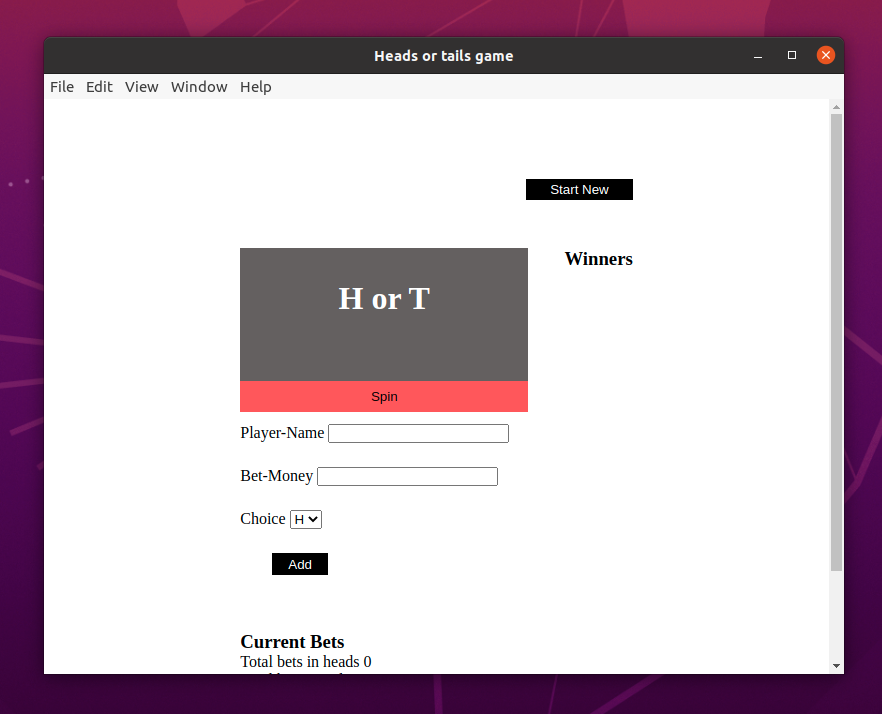
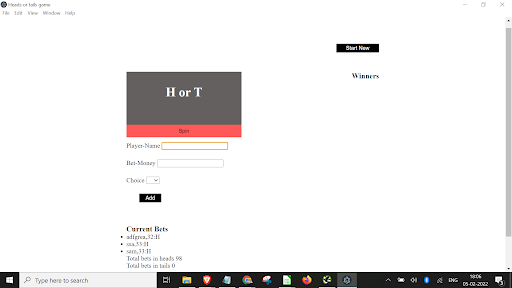
$ npm startAfter npm start, when the compilation is done, the app will open as shown below.
If not recheck your main.js and package. JSON file whether you have committed any mistakes and update as per the documentation.
We have successfully launched the app and the next step is building this application to run in all the available os that is Linux, Windows, and macOS.
Step:6 Packaging and distribution of our application
This is a crucial step to achieving the task. Carefully follow each of the steps and run the commands. We can build the app either using the electron build method or with electron forge.
I’ll go with the electron forge method.
First, we need to install the electron forge packages and dev dependencies, below command does the job for us
$ npm install --save-dev @electron-forge/cliAfter successful installation, the package.json will be updated with the required dependencies. Next, you need to import the forge configurations and the command is
Note:
The application will run if these dependencies are installed successfully, otherwise, there will cause blockage for the next steps. Next, you have to run the below command to be done for the final step which is creating os specific apps.
$ npm run makeThe functionality of the command depends on the type of machine or OS that is running. For example, I’m using a Linux machine so, it will install the required packages and app that supports only Linux.
Here are the results after the npm run,
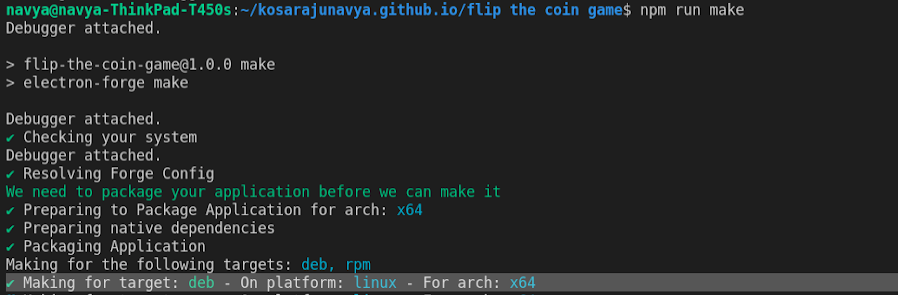
-> Dependencies are installing….
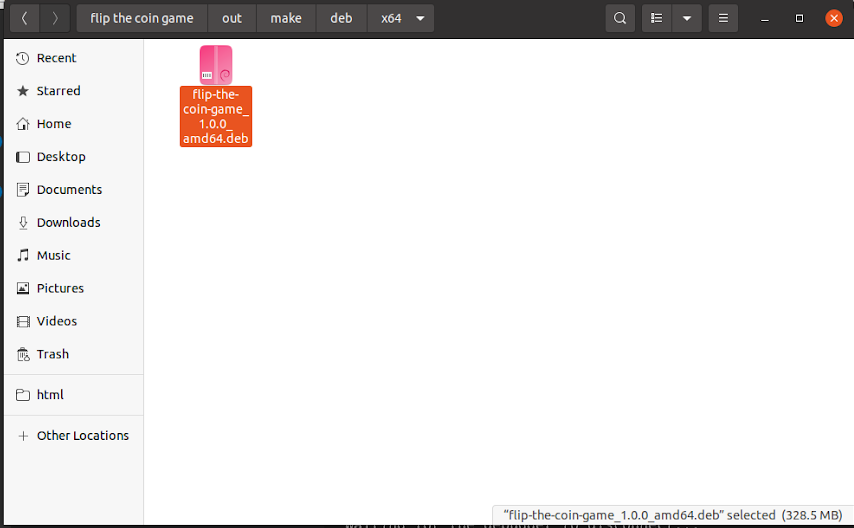
-> after successful installation, you will see the file with .deb extension and that is our requirement.
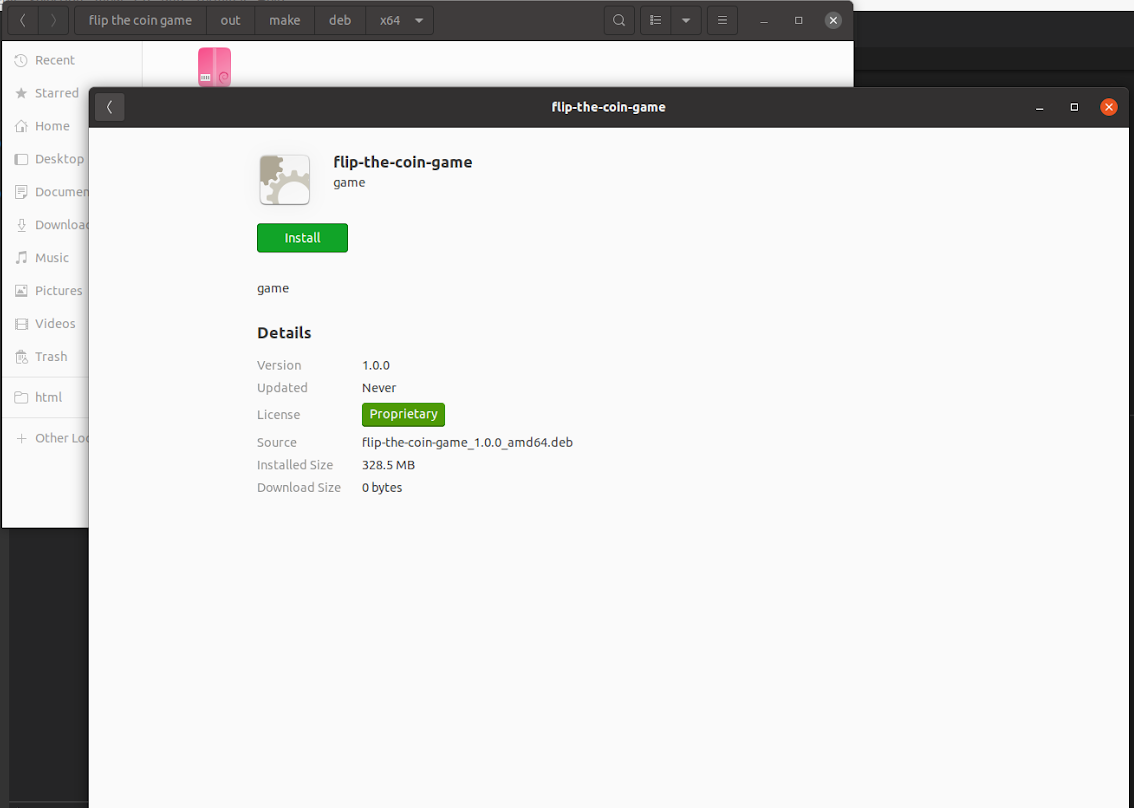
After that open the installed app.deb file in the folder path -> projectname/out/make/deb/x64/projectname.deb. Then you will navigate to the ubuntu software applications as shown below.
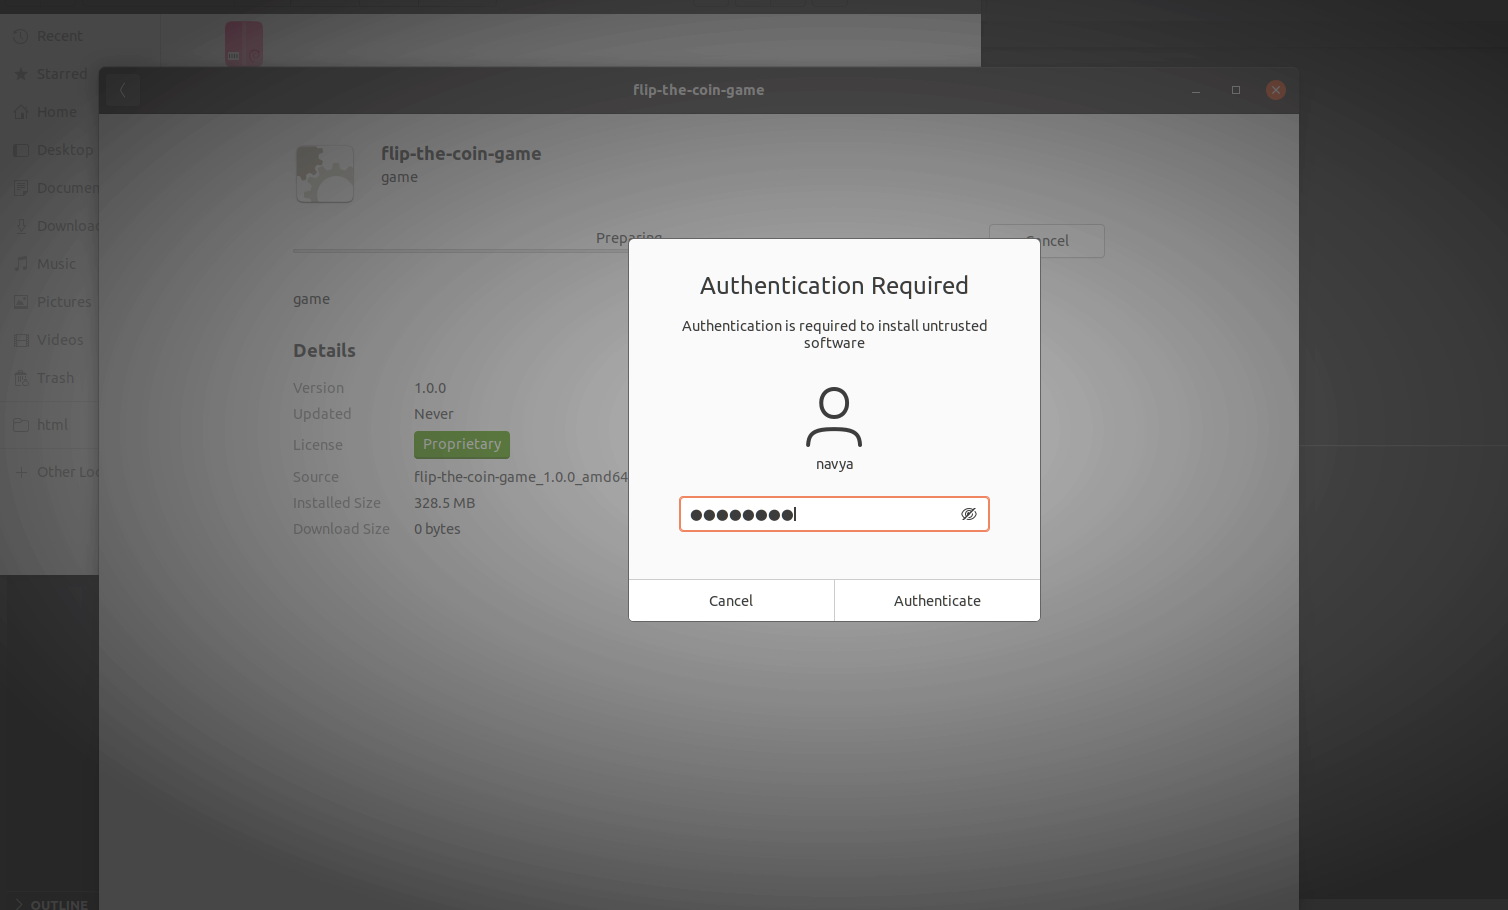
Give the password and authenticate it. After that, your application will be installed.
Then check in your ubuntu applications, and the app presents there as shown below.
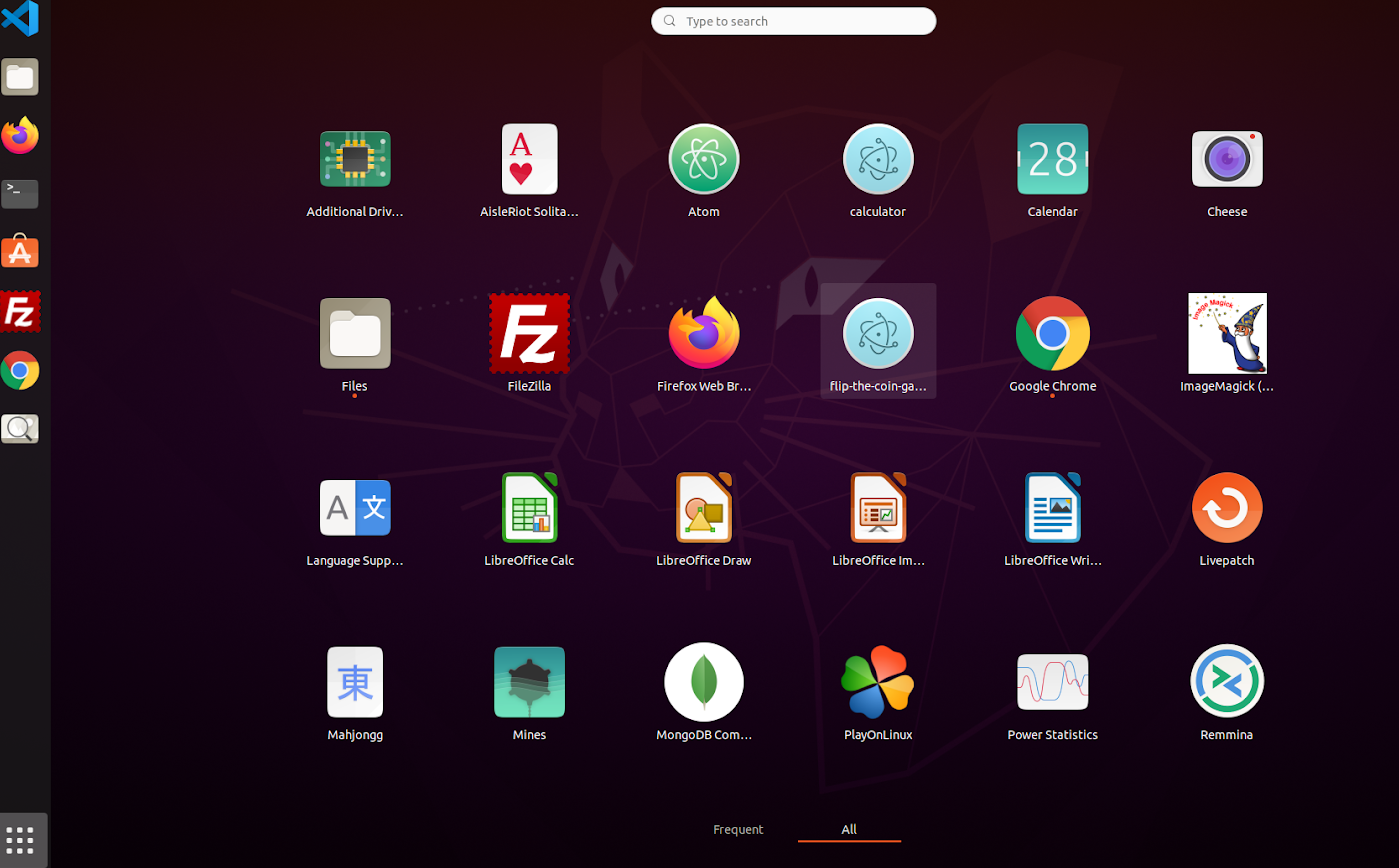
Open the app and run it.
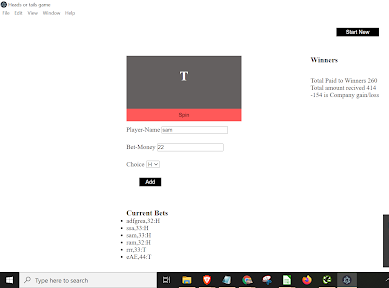
So the application ran successfully on Linux devices, and also check for the game results.
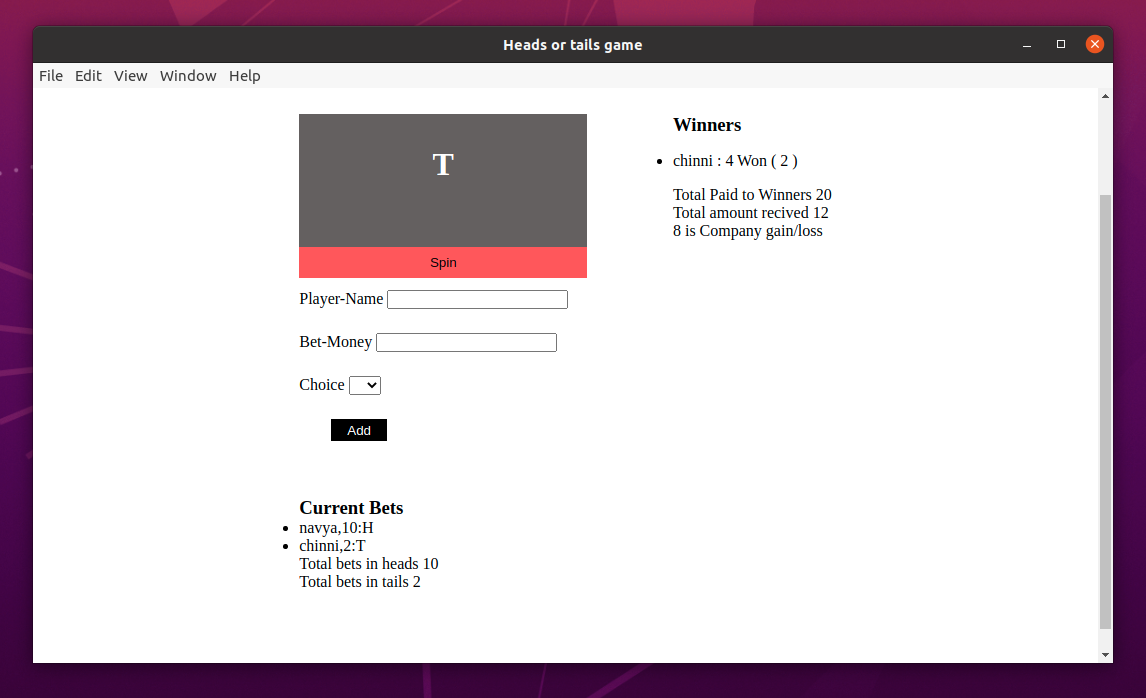
Oh wow! The app ran as expected. Congratulations, you have created a Linux desktop application successfully and the same procedure for Windows and macOS if you develop the application on respective devices.
Here is another question, can we create an application that runs in all OS from a single machine.
To justify the problem, yes, we can build the application for all OS if we can able to install the required packages and dependencies of all the available os.
Note:
Linux users can build the application for both Linux and Windows.
Windows users can build an application only for windows.
Mac users can build the application for all the platforms.
Building the same application for Windows on a Linux machine
If you can install the windows package and electron builder then it is the effort of one line code. Check out the below snippet to know how to install windows packages and dependencies in Linux - Ubuntu. (snippet of installing windows packages)
The command to build a windows application in Linux after the packages installation is
$ electron-builder --winAfter executing the command the build results are as shown below
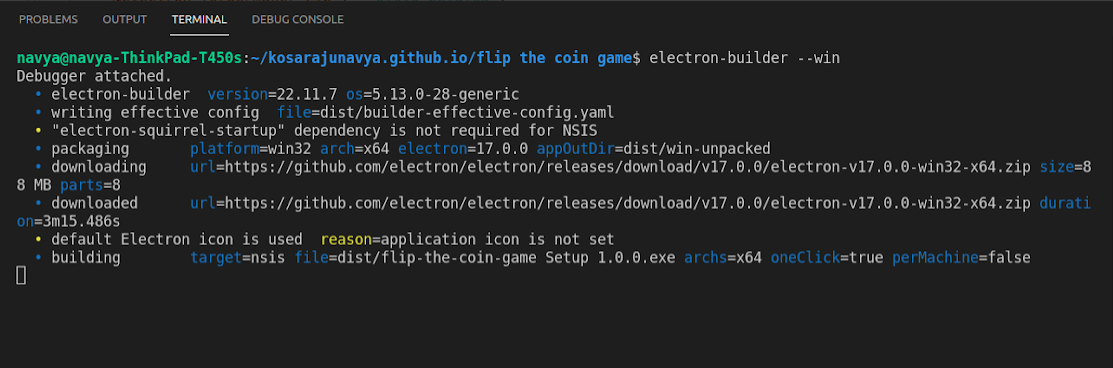
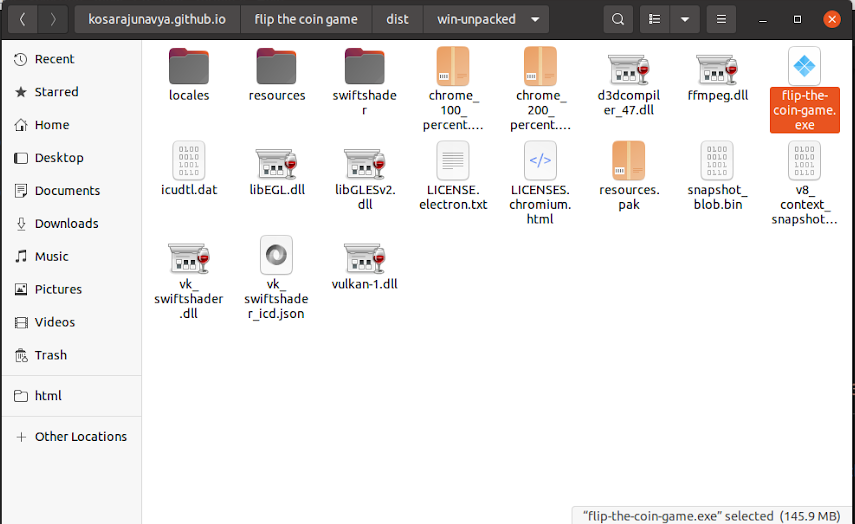
If the build is completed then you can see the appname.exe file in the file folders as shown below.
If you run the app on a windows machine, the results are shown below.
App ran in windows machine also.
Screenshot of results
Finally, I want to conclude that we have developed a desktop application that can run on all devices. Hope you also developed the application with this blog.
Most probably if you are a beginner and developing the application you may get the troubleshoot console errors like missing the packages and dependencies, don’t get scared just debug the console errors and install the required packages. Still, if you are facing any issues please comment on your issue we will always be there to clear your issues. Thank you so much for reading.

Comments