As a Drupal themer, it is good to have knowledge of a standardized folder structure and managing them, you have landed on the right blog to shine your skills.
As per Drupal standards, we need to create the folders and files, otherwise, the site will break, this article will guide you on the right path for all the theming-related folders.
Creating a custom theme folder in the right path
Custom theme folder path should always be in /var/www/html/drupals/my_project/web/themes/custom/custom_theme_name. We are not allowed to create or modify the core themes. If you want any base theme or any contributed themes to your site then you can install the required contributed themes here and all the contributed themes will be stored in this path /var/www/html/drupals/my_project/web/themes/contributed/contributed_theme
To be more clear let us see one example of both the custom theme folder and contributed theme folder path.
Creating a custom theme folder
We can create the folder in three methods one is with the command line, the second method is using UI navigation, and with the editor. One and only clear and simple method is using the command line. Now, we are going to create a theme with the existing drupal site. You can follow this article for the initial setup of the drupal site. The required commands are
#example drupal site that is configured in my local is drupalblogs, the path should be your drupal site path.
$ cd /var/www/html/drupals/drupalblogs/web/themes #right path for all the custom themes
$ mkdir custom #creating custom directory
$ cd custom #changing present working directory to custom directory
$ mkdir nature #creating custom theme name
In the custom directory, you are seeing two folders by the names nature and creative. Those are the custom themes, generally, we will be having only one theme as the standard one, if the requirement will include any sub-theme or base theme those related themes should be on the custom path.
The above steps are for custom theme structure, now let us observe how contributed themes organized their folder structure.
Downloading contributed theme and analysis of folder structure
Let us download one of the most popular contributed themes bootstrap 3 for drupal in the composer method. You can download the theme with the below-given command.
$ composer require ‘drupal/bootstrap:^3.23’After the successful installation, the contributed theme will be available in the below-given path,so there you can check the folder structure
$ cd /var/www/html/drupals/drupalblogs/web/themes/contrib/bootstrap
$ ls
Creating yml files and .theme file
theme_name.info.yml
When you are done with creating your custom theme in the themes folder, then we need to create the theme_name.info.yml file. This .info.yml file will give the metadata of your theme to drupal so that it can be easily identified by drupal.
We need to follow some standards while creating a .info.yml file. Here is the list,
- We need to create a human-readable theme name followed by a machine name
- The purpose of the machine name is we can use it for preprocessing functions in the .theme file, folders, and the required areas
- The machine name is nothing but a human-readable name that is converted into lowercase letters and underscores
- The machine name and nomenclature should be written while considering the below points
- Machine name should be with a lowercase letter
- Machine names should not start with special characters
- Machine name should not consider of space, instead of space we can use underscore
- Machine names should not start with letters and spaces
- The limit of characters for the machine name is 50
- Machine names should be unique and should not be any of the predefined functions, module names, library, src, vendor, images, CSS, scss, js, templates, and other drupal distributed folder names.
- We need to provide some metadata of the theme which includes theme name, drupal supported version, and theme description, followed by required data.
- We have to define our theme regions in the .info.yml file only. Here is an article that can guide you through creating regions and how to work with page.html.twig (link the blog)
To be more clear, let us create a theme_name.info.yml for the above example theme. So here my theme name is nature and the file name should be nature.info.yml. Have a glance at the below code.
nature.info.yml
name: Nature Theme
type: theme
base theme: false
description: "Simple nature theme"
package: nature
core_version_requirement: ^8 || ^9
libraries:
  - nature/global-styling

regions:
  header: "Header"
  primary_menu: "Primary menu"
  secondary_menu: "Secondary menu"
  page_top: "Page top"
  page_bottom: "Page bottom"
  highlighted: "Highlighted"
  breadcrumb: "Breadcrumb"
  content: "Content"
  sidebar_first: "Left sidebar"
  sidebar_second: "Right sidebar"
  footer: "Footer"
theme_name .libraries.yml
libraries.yml file is to include all our CSS and js files. Here is the example of the libraries.yml file for the nature theme.
nature.libraries.yml
global-styling:
css:
theme:
css/style.css: {}
js:
js/main.js: {}
dependencies:
- core/jquery
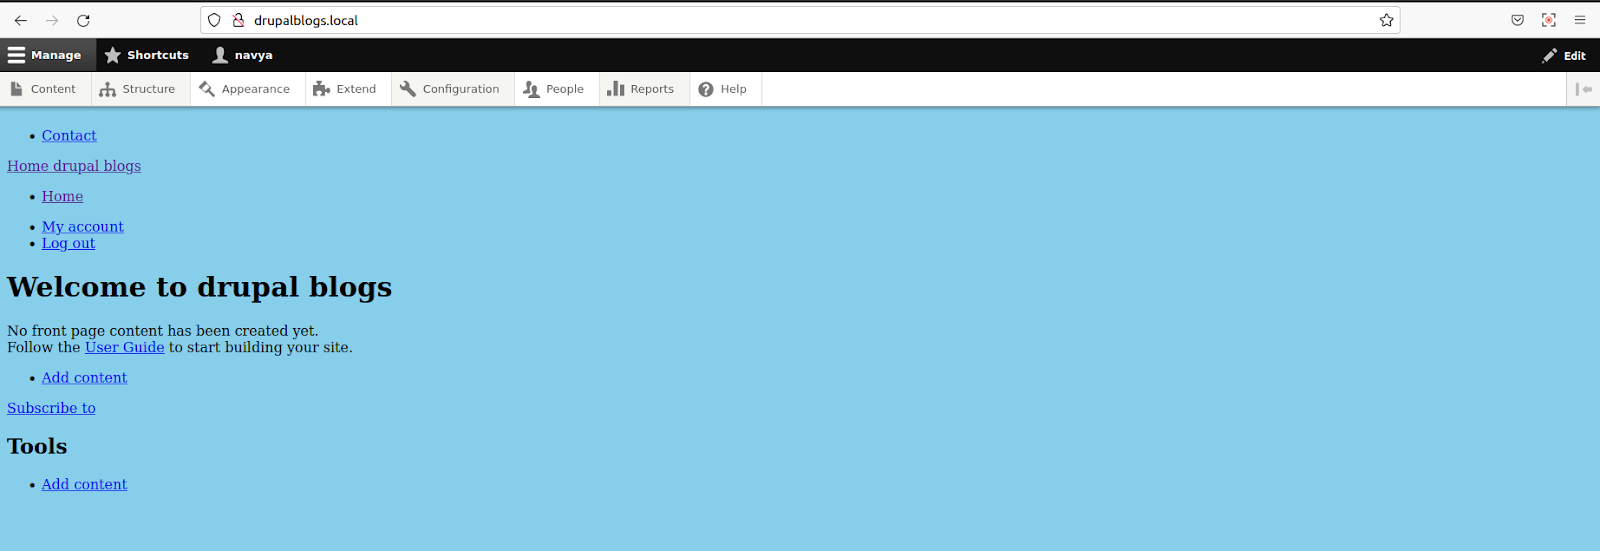
- core/drupalTo check whether the CSS and js are reflecting or not, apply some CSS to the body and then do check your local site. Before that, you need to clear the cache. Now in style.css, I’m applying the following property.
body {
  background-color: skyblue;
}
I always prefer to use the command line for cache clear and it will save your time. The command to do cache clear is
$ drush cr
If drush is not working in your system then use the following command to do cache clear in the drupal site path and that is /var/www/html/drupals/drupalblogs
$ php vendor/drush/drush/drush.php If you want to check the results, you need to enable the custom theme in drupal sites. To enable the theme go to appearance in the drupal site select the custom theme and set it as default.
Here are the screenshots for your reference.


The CSS property is reflected here. The same method for js also.
theme_name .libraries.yml
theme_name.theme file should consist of all the required preprocess functions and theme_hook_suggestions related stuff. To learn about these functions you can follow this article about preprocess functions.
UI-related files and folder structure
After all the theme folders are set up, we need to create the CSS, js, and other asset-related files as per the standards. Commands to create the UI-related files
$ cd /var/www/html/drupals/drupalblogs/web/themes/custom/nature #theme path
$ mkdir css js images templates #creates css,js,templates and images folders
$ cd images
$ mkdir siteImages icons #standard images folder structure
Template structure
The entire Drupal site runs on a twig templating system. Click here to learn more about twig.
A very standard and basic template folder structure should
- Templates
- Content
- Node
- User
- view
Use the command line to create these folders in the template directory
$ cd /var/www/html/drupals/drupalblogs/web/themes/custom/nature/templates #templates path
$ mkdir content node user view
Then all the folders will be created in the template folder, and we take the standard twig templates based on the content creation in the site with the help of twig file name suggestions. To enable twig-debug, navigate to this file, required commands are given below.
$ cd /var/www/html/drupals/drupalblogs/web/sites/default
$ ls
$ sudo nano services.yml
Then change the debug value from false to true as shown below.
# @default false
debug: true
# Twig auto-reload:
If the file doesn't exist then copy the default.services.yml to services.yml and change the permissions. To do this check the below blog (site setup blog)
This is the reference screenshot from vs code editor, you can also edit here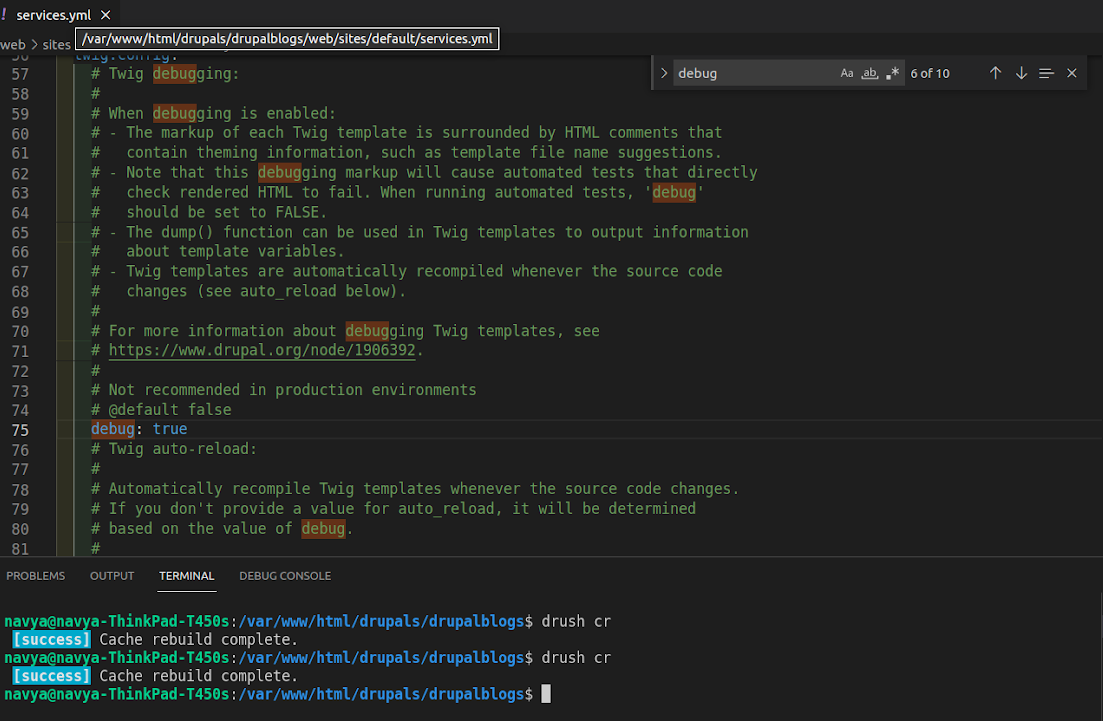
After enabling the debug value to true, then do cache clear and check the results.
Right side inspector, you can see the twig template suggestion, as per the suggestions only we have to take the template name and configure them within the respective template folder. To know how to override the node template you can follow the blog.
Finally, I want to conclude that, whenever you are creating any custom theme you should follow all the above-given steps. Hope you find sufficient information about the folder structure of theming. You can add this article to your reading list for future reference.

Comments