This blog explains to create restful APIs using Drupal Views using the restful page we can share the data from our website to external websites or applications.
Significant architectural changes were made with Drupal 9 and new methods for creating digital experiences were made available. One of these was the REST API, which was preinstalled in the core. An API that complies with the REST (representational state transfer) architectural style is known as a RESTful API. It makes HTTP requests for the GET, PUT, POST, and DELETE data types to access and uses data.
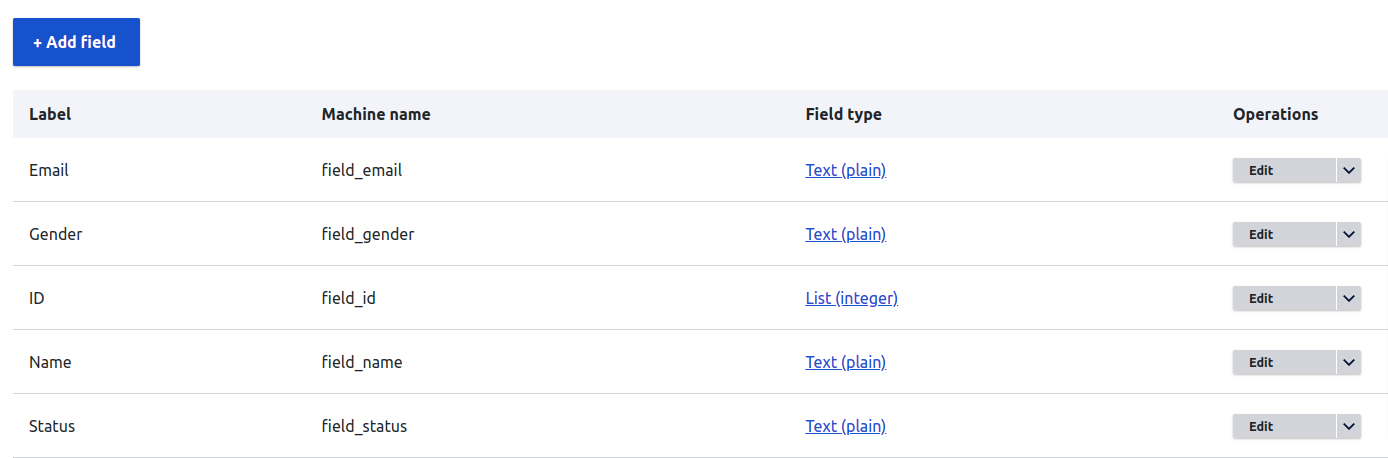
Before we create REST API, let’s build an Employee Details content type for creating references to employee data that our REST API will expose to other applications.
Create content type with fields:
- For example, create content type “Employee Details” (/admin/structure/types/add) with fields Name, Email, Gender, ID, and employee status.
![content_type_employee_details_with_fields]()
- Add content or employee details (/node/add/employee_details) to the content type “Employee Details”.
- To create dummy data by using the Devel module.
Create a REST API using Views:
Before we get started, let’s look at the following modules.
- RESTful Web Services
Along with defining initial resource routes, the RESTful web services module also manages the resources plugin system. The DB log module, which offers a watchdog entries API endpoint, is a nice example of a resource plugin. Data obtained from the database is the responsibility of the resource plugin.
- Serialization
The serialization module uses the data from your database to create JSON or XML representations of it. The object will be represented internally as an array before being converted to either format. The deserialization and serialization of request response data fall under the responsibility of the serialization module.
- REST UI
RESTful web services configuration is exposed through the Rest UI module via the admin UI. By changing the YML files in this manner, we can configure our API endpoints.
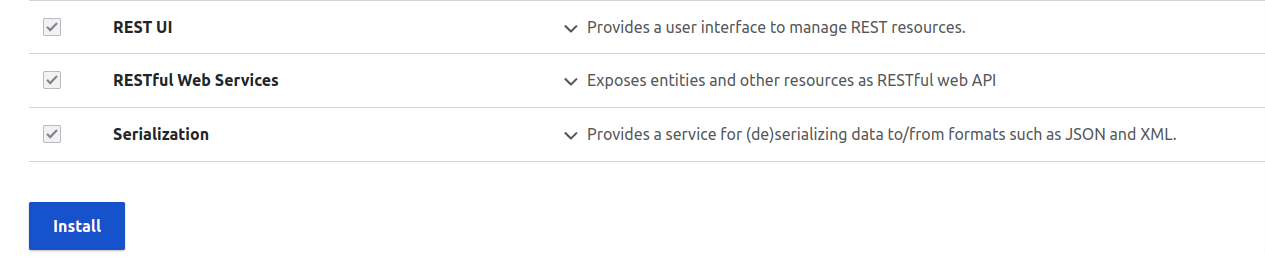
Enable the RESTful Web Services with the required modules:
- To create the restful APIs first we need to enable the following modules,
- RESTful Web Services
- REST UI
- Serialization
- In extend page (admin/modules) scroll down to the Web Services section and install three modules: RESTful Web Services, REST UI, and Serialization.
Create a view:
- Go to Structure > Views and click "Add view".
- Enter the View name as “Employee API” and select the content type “Employee Details”.
- Finally, choose the check box "Provide a REST export" and enter the REST export path as “api/employee”. Then, click Save and edit.

Configure view settings:
Add the required fields and filters to view
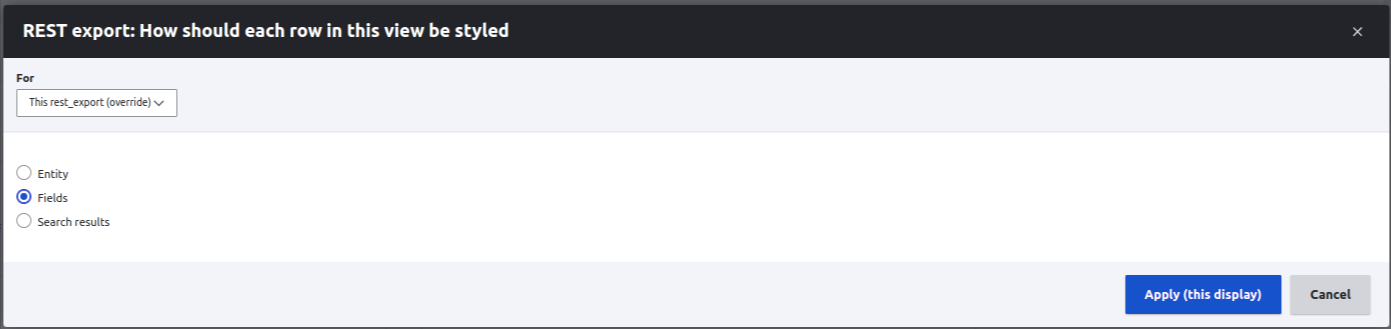
- The output of view Default format as the entity, we want to get the output in the format of fields then change entity to fields ( Format → show) and click Apply.
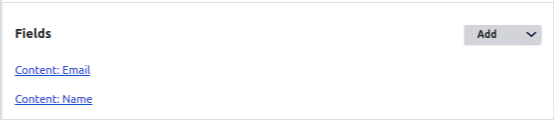
- Add the required fields to view for example added the name and email of the content type of “Employee Details”.
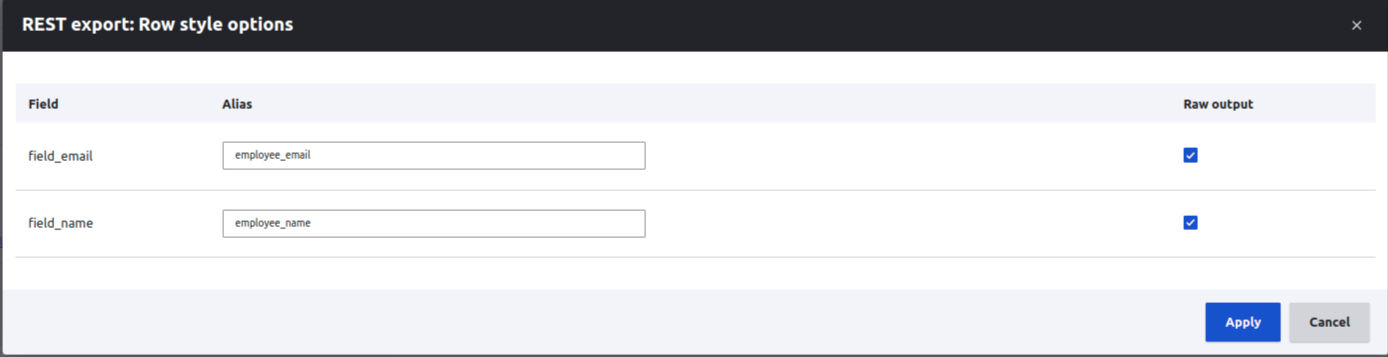
- Add Alias for fields (Fields →Settings) as shown below and select raw output and click Apply.
- Next, we need which format of output from the API (json, xml etc).
- If we want JSON format click Serializer → settings and select json and click Apply.

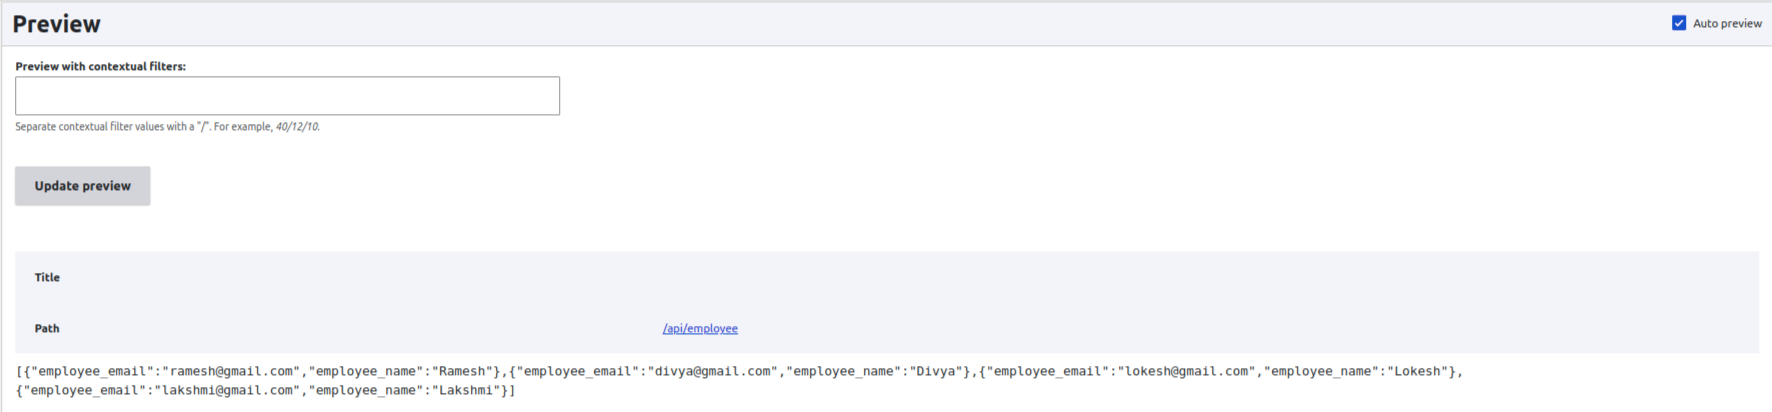
- Finally, save the view then the preview should be like this
- At the top, click on “REST export,” which is the default display name.
- To change the name to “Employee Details” click Apply.

Test the REST API:
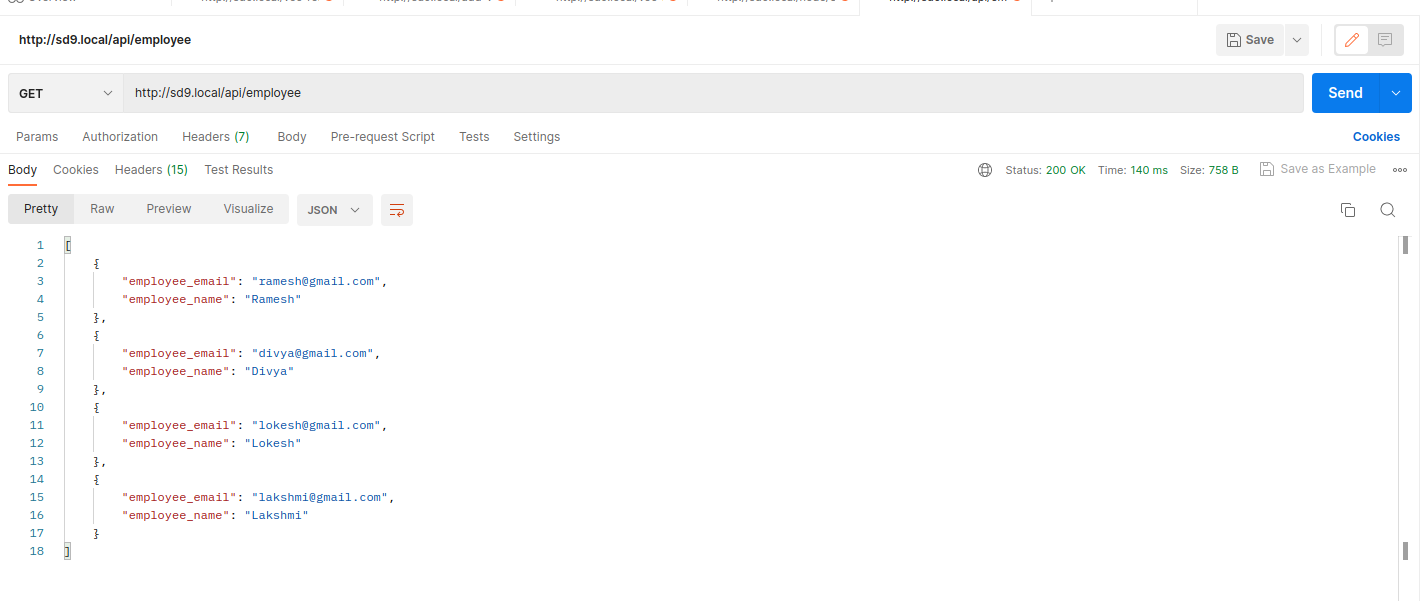
Let’s test our JSON output by using Postman or an endpoint URL.
- Go to the endpoint URL that clients will actually use to request data; it should finish in /api/employee. Your JSON needs to be there also.

- Get the JSON data by using Postman.
Get data to Particular Employee using a unique ID:
- In Drupal, each content item has a unique numerical ID that is included in the URL.
- Back on the view configuration page, just above the Advanced section on the right, click the carat to the right of “View Employee Details” and above “Advanced.”
- In the dropdown, click Duplicate Employee Details.
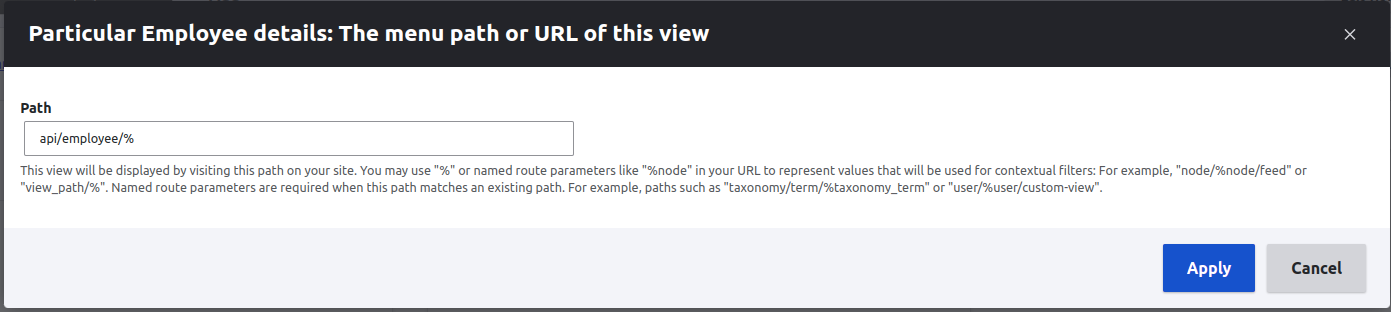
- Give this view a display name of “Particular Employee details”.
- Change the path (Path settings → path) to /api/employee/% in the path settings. A wildcard that corresponds to the ID is the % symbol.
-
Click apply.

-
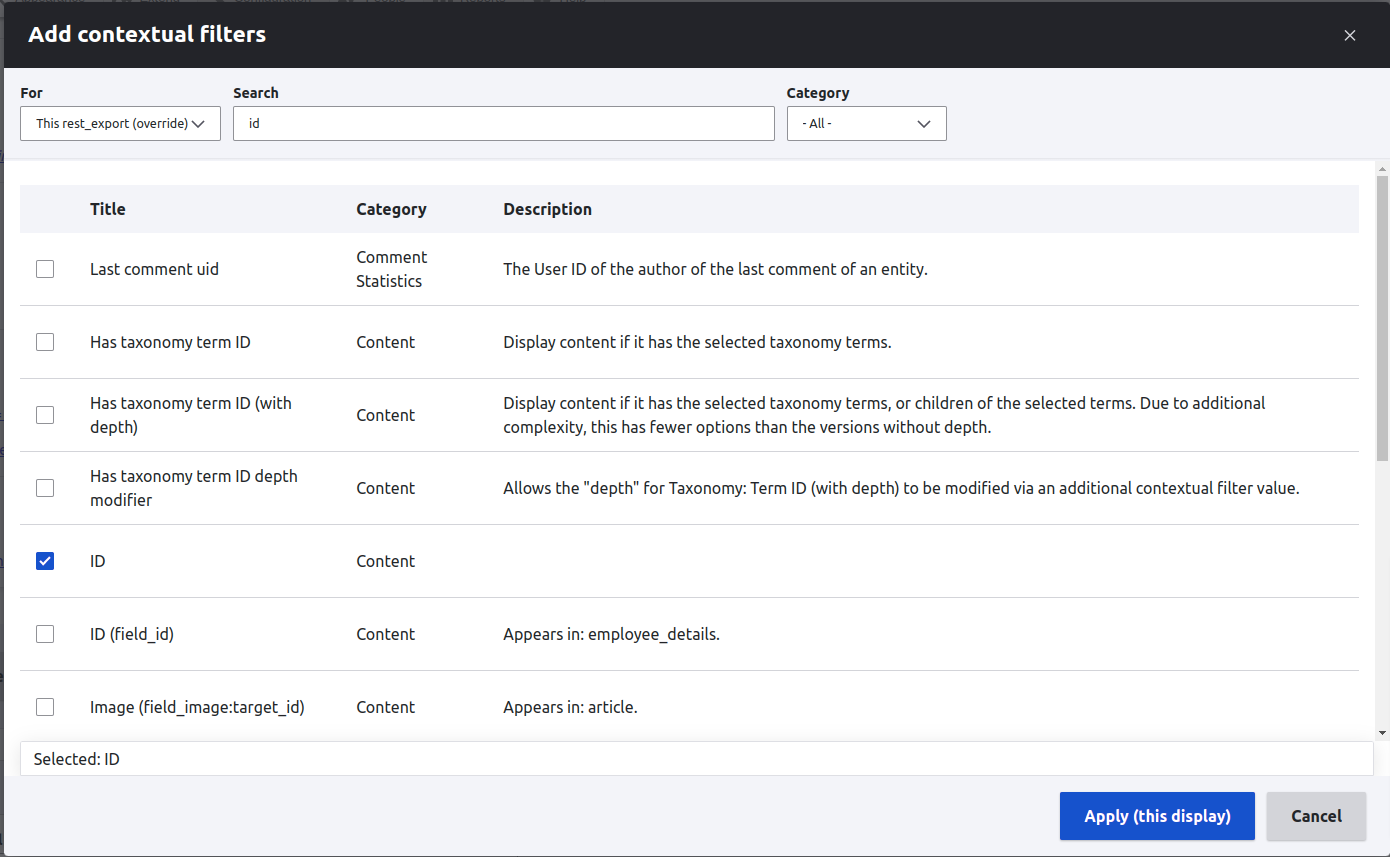
Open the Advanced panel. Under contextual filters, click Add.
-
In the dialog, change from “All Displays” to “This rest_export (override).”
- Use the search and category filter to narrow down to ID. Check ID and click Apply.
- Next, select “Provide default value” and type as “Content ID from URL”.
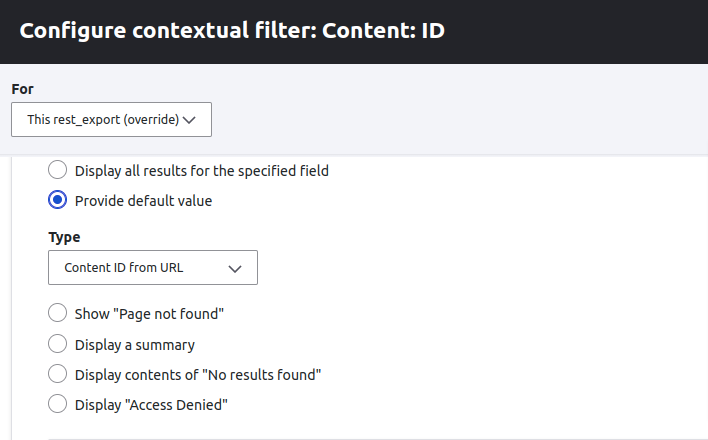
-
Click Apply at the bottom of the dialog and save the view.
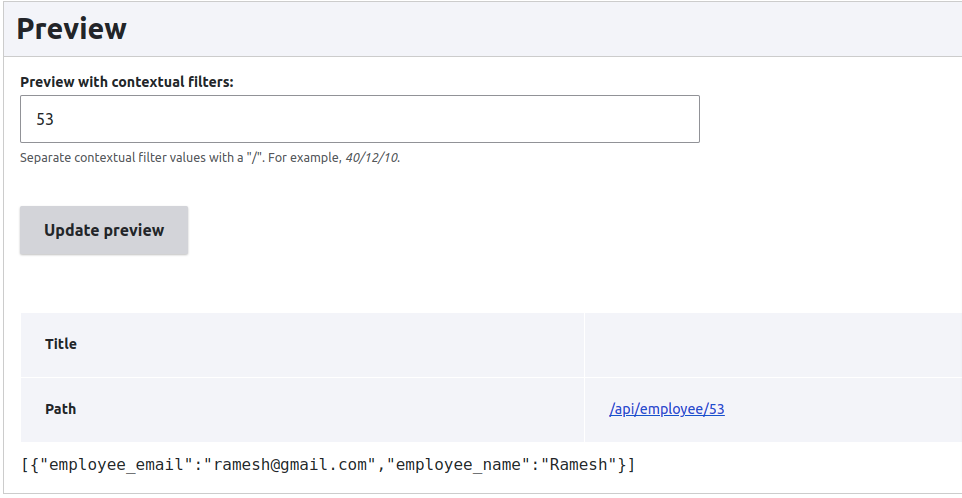
- For a quick test, scroll down to preview and type in a known ID for example 53. You should see only particular employee details in the JSON.
-
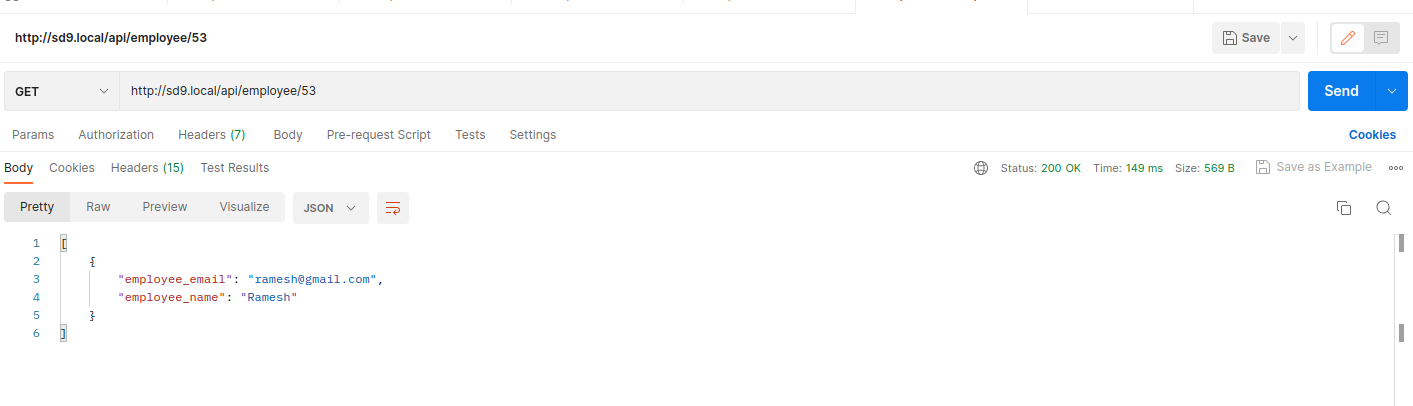
Now test on Postman,
Finally, created REST API using views in Drupal 8 and Drupal 9.

Comments