Drupal 8/9 custom forms can be created programmatically using PHP and the Drupal API for dynamic form building and site integration without relying on UI components.
In Drupal 8/9, there are three steps to creating a custom page.
- Create a custom module in drupal.
- The routing must be declared in the module_name.routing.yml file.
- Finally, create the class that handles the custom form.
Create a custom module:
Modules in Drupal are located in the /modules folder. We'll create two custom and contrib folders inside the /modules folder. Additional modules from drupal.org will be stored in the contrib folder, and our custom modules will be stored in the custom folder.
Create a .info.yml file:
Let's name our custom module registration_form. Create the folder /modules/custom/registration_form. In this folder, we'll need to create the registration_form.info.yml file and add the following code.
name: Simple Registration Form
description: Custom module for simple registration form.
type: module
core_version_requirement: ^8 || ^9
Enable a module:
For all possible ways to enable a module click here.
Using the Manage administrative menu, navigate to the Extend page in the list of modules, search the Simple Registration Form module and then select its checkbox. Scroll down to the bottom of the webpage, and then click Install.
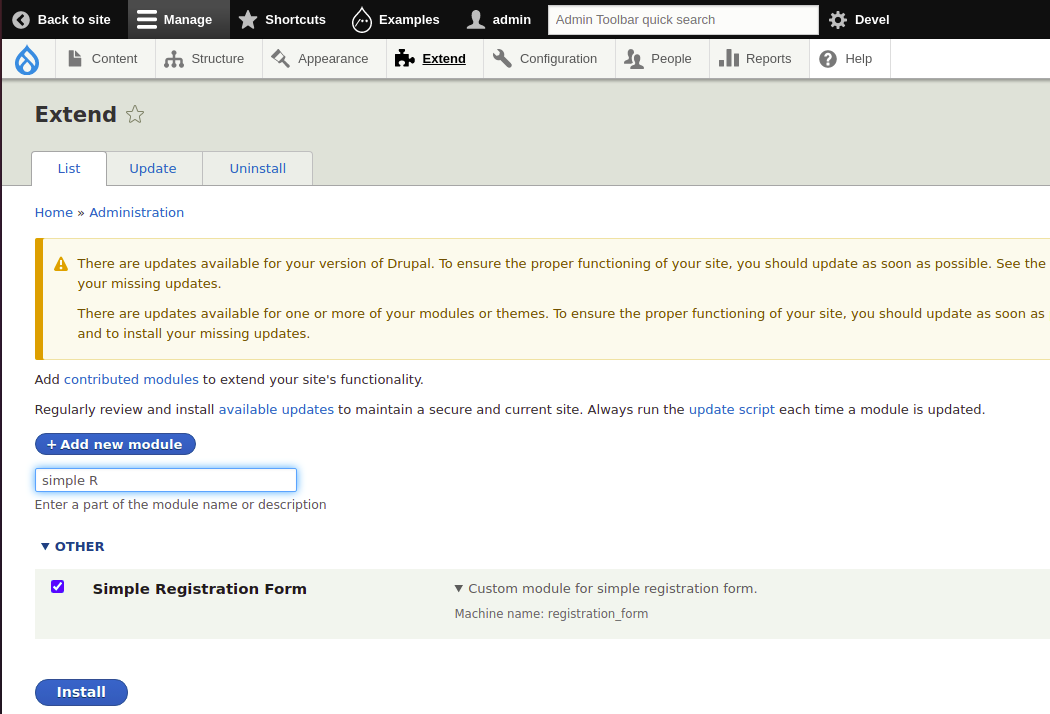
Module Simple Registration Form has been enabled successfully.
Declaring a route:
The routing information is saved in registration_form/registration_form.routing.yml.
registration_form.simple_form:
 path: '/simple-custom-form'
 defaults:
   _title: 'REGISTRATION PAGE'
   _form: '\Drupal\registration_form\Form\SimpleRegistrationForm'
 requirements:
   _access: 'TRUE'
Let us take a closer look at what is contained in this YML file.
registration_form.simple_form: This is the route's machine name. Route machine names should be formatted as module_name.sub_name.
path: This is the URL of the page on your website.
defaults: This section describes the form title and class.
requirements: This defines the conditions under which the form will be displayed.
Create the form class :
Create the form class required to implement a few methods:
- getFormId(): It returns a string that is the unique ID of your form.
- buildForm(): This returns a Form API array containing the elements of your form.
- validateForm(): This function validates the form submission when the user submits the form
- submitForm: This function is called after validateForm() has successfully validated the form submission, allowing us to act on the submitted values.
Create the registration_form\src\Form\SimpleRegistrationForm.php file with the following code in it.
<?php

namespace Drupal\registration_form\Form;

use Drupal\Core\Form\FormBase;
use Drupal\Core\Form\FormStateInterface;

class SimpleRegistrationForm extends FormBase {
 public function getFormId() {
   // Here we set a unique form id
   return 'simple_form';
 }

 public function buildForm(array $form, FormStateInterface $form_state, $username = NULL) {
    // Textfield form element.
   $form['first_name'] = array(
     '#type' => 'textfield',
     '#title' => t('First Name:'),
     '#required' => TRUE,
   );
    // Textfield form element.
   $form['last_name'] = array(
     '#type' => 'textfield',
     '#title' => t('Last Name:'),
     '#required' => TRUE,
   );
    // Textfield form element.
   $form['email_id'] = array(
     '#type' => 'email',
     '#title' => t('Email ID:'),
     '#required' => TRUE,
   );
    // Textfield form element.
   $form['mobile_number'] = array (
     '#type' => 'tel',
     '#title' => t('Mobile no'),
   );
    // Textfield form element.
   $form['dob'] = array (
     '#type' => 'date',
     '#title' => t('DOB'),
     '#required' => TRUE,
   );
   // select form element.
   $form['gender'] = array (
     '#type' => 'select',
     '#title' => ('Gender'),
     '#options' => array(
       'Female' => t('Female'),
       'male' => t('Male'),
     ),
   );
   // Radio buttons form elements.
   $form['confirmation'] = array (
     '#type' => 'radios',
     '#title' => ('Are you above 18 years old?'),
     '#options' => array(
       'Yes' =>t('Yes'),
       'No' =>t('No')
     ),
   );
   //submit button.
   $form['actions']['submit'] = array(
     '#type' => 'submit',
     '#value' => $this->t('Save'),
     '#button_type' => 'primary',
   );
   return $form;
 }
 public function validateForm(array &$form, FormStateInterface $form_state) {
   if (strlen($form_state->getValue('mobile_number')) < 10) {
     $form_state->setErrorByName('mobile_number', $this->t('Mobile number too short.'));
   }
 }

 public function submitForm(array &$form, FormStateInterface $form_state) {
   \Drupal::messenger()->addMessage($this->t('@can_name ,Your application is being submitted!', array('@can_name' => $form_state->getValue('first_name'))));
   foreach ($form_state->getValues() as $key => $value) {
     \Drupal::messenger()->addMessage($key . ': ' . $value);
   }
    $form_state->setRedirect('<front>');
 }
}
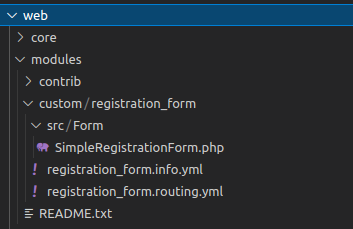
The structure of the custom Form module:
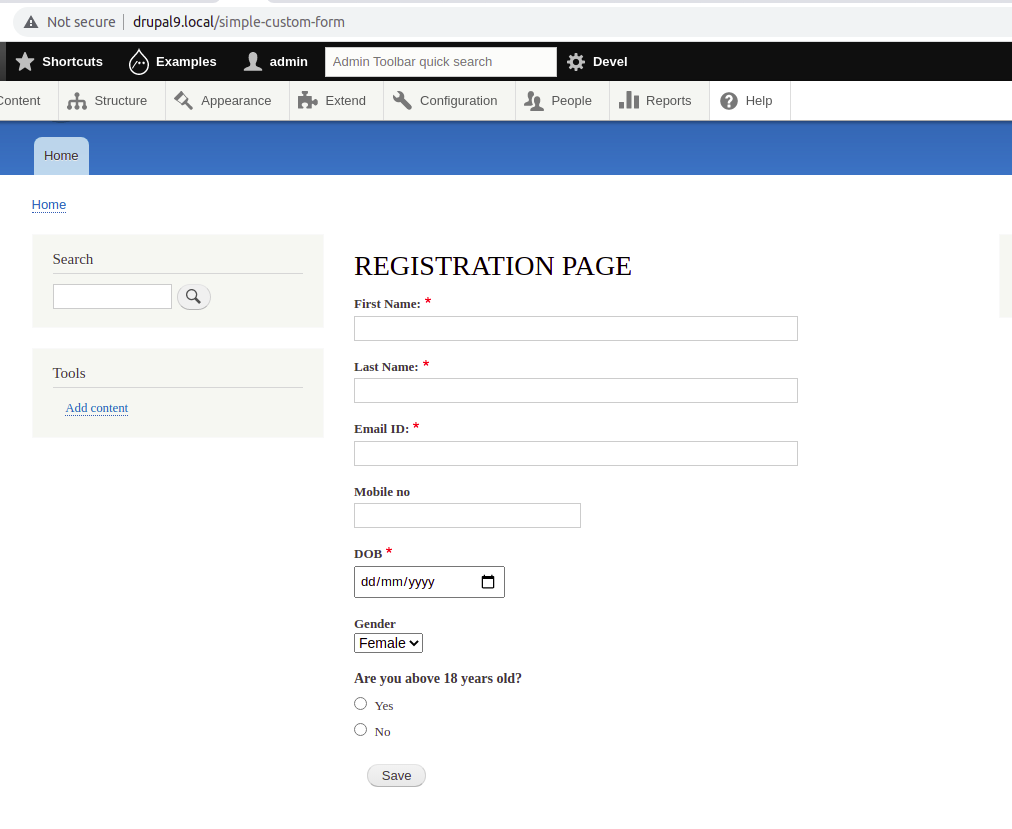
After clearing the cache, you should be able to see your customized form page.
Output After entering the values in the form then click save.
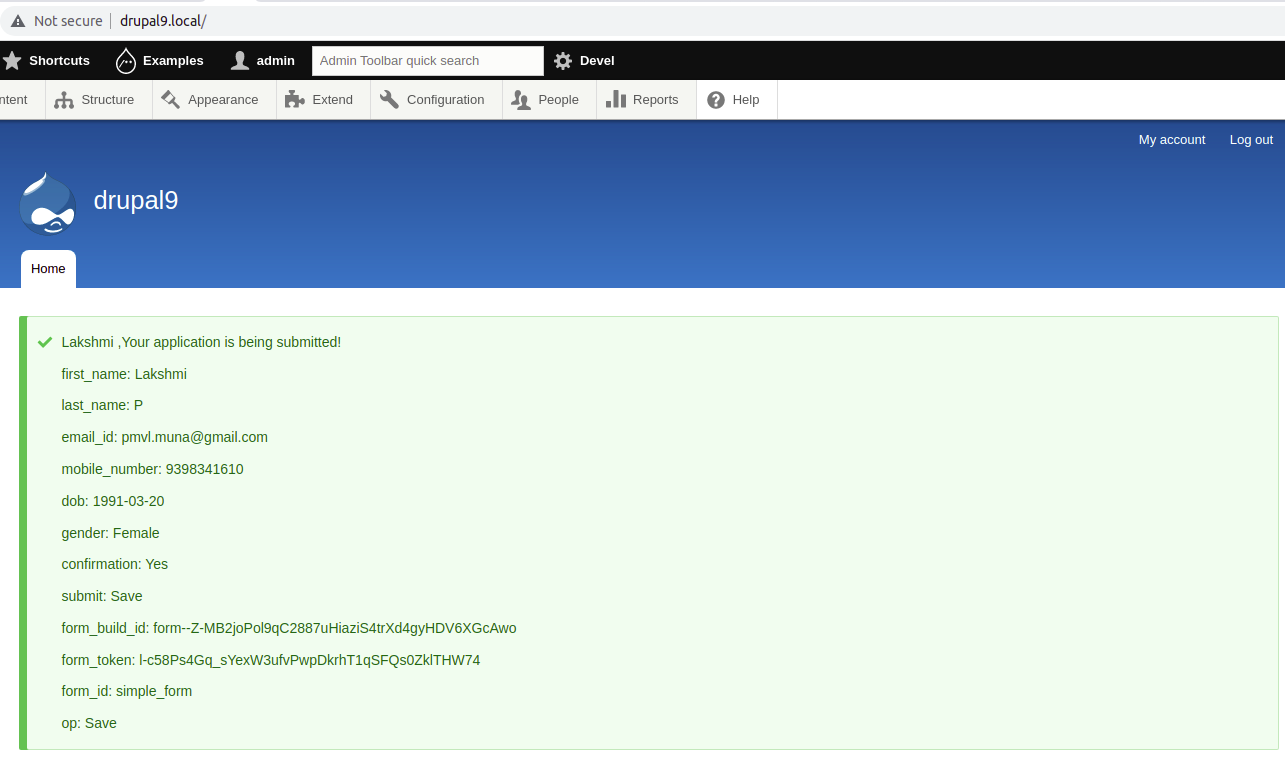
Note: After clicking save then page redirect to front page.if you don’t want to redirect front page then remove line $form_state->setRedirect('<front>'); from SimpleRegistrationForm.php file.
Conclusion:
That's all! You have successfully created your first Drupal 8/9 custom registration form.

Comments